If you’re using Ubuntu or Ubuntu-based distribution and want to find or list out which webcams are connected to your system, you can do this easily using a few simple commands. Whether you’re troubleshooting a webcam issue or just curious about what’s available, here’s how to check all connected webcams in Ubuntu.
This article will guide you through the process of identifying all available webcams on your Ubuntu system using command-line tools and graphical interfaces.
1. Using the lsusb Command
The lsusb command lists all USB devices connected to your system, including webcams.
lsusb
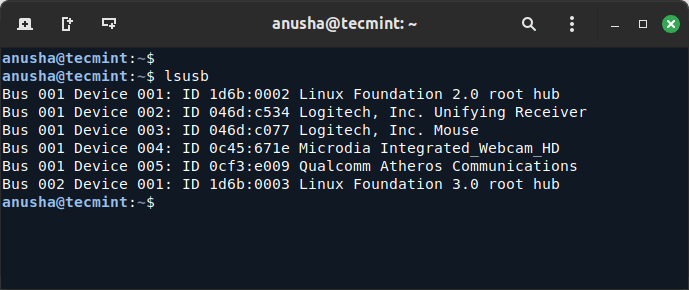
The above command will list all connected USB devices to your system, look for entries that mention “USB Video Device” or similar, which are typically your webcams.
The output will look something like this:
Bus 001 Device 004: ID 0c45:671e Microdia Integrated_Webcam_HD
In this example, the “Microdia Integrated_Webcam_HD” is detected. The numbers before and after the colon represent the USB vendor and product IDs, which can be useful for identifying specific devices.

2. Using the v4l2-ctl Command
The v4l2-ctl command is part of the v4l-utils package, which provides detailed information about video devices and webcams.
sudo apt install v4l-utils
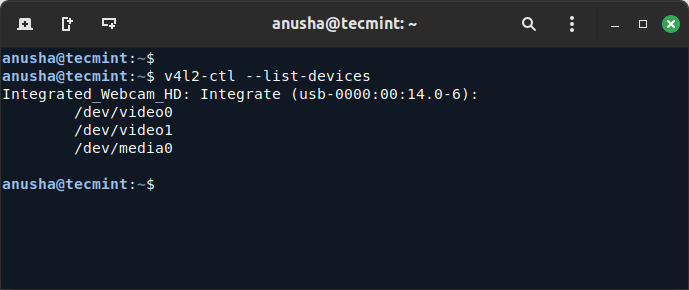
v4l2-ctl --list-devices

Here, /dev/video0 is the device file associated with the Integrated_Webcam_HD. You can use these device files to interact with your webcams.
3. Using the dmesg Command
The dmesg command shows system messages, including those related to hardware detection. It can be useful for finding out if your webcam was detected by the kernel:
dmesg | grep video
This will display messages related to video devices, which may include information about your webcam.

4. Using the Cheese Graphical Tool
Cheese is a simple webcam application that allows you to view video from your webcam and take photos.
sudo apt install cheese
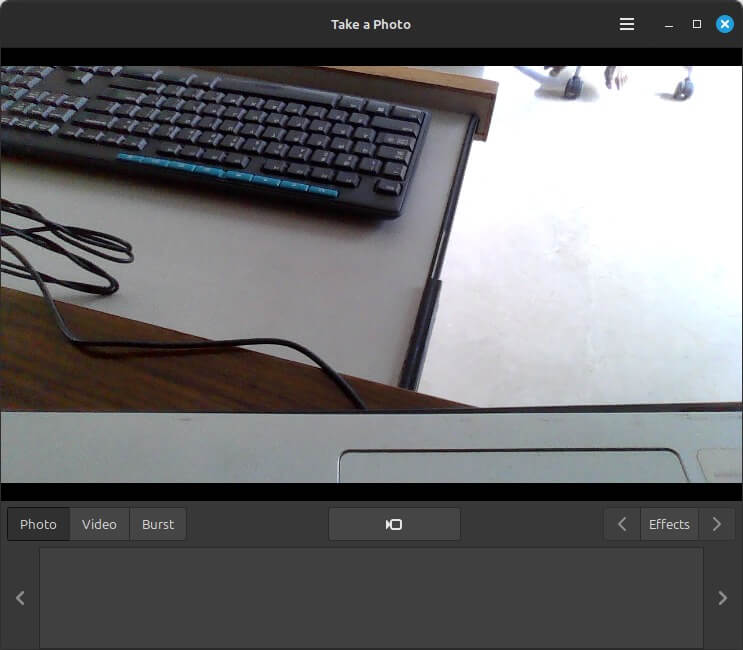
Open Cheese from the applications menu. If your webcam is working, you should see its output in the Cheese window.

5. Using GNOME Settings
If you are using GNOME, you can check your webcam settings through the GNOME Control Center. Open Settings from the applications menu.
Go to the “Devices” section and select “Camera” if available, this will show your connected webcams.
Conclusion
Checking all available webcams in Ubuntu is straightforward with the use of command-line tools like lsusb, v4l2-ctl, and dmesg, or through graphical applications such as Cheese and GNOME Settings.
Each method provides different levels of detail, so you can use the one that best suits your needs.


