
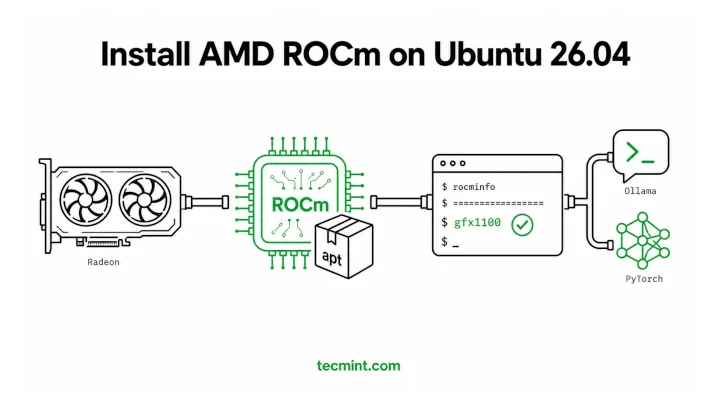
Ubuntu 26.04 LTS changes that. AMD’s ROCm platform is now available directly from the official Ubuntu repositories, making GPU acceleration as easy to install as any other package. Instead of hunting for external repositories and matching software versions, you can install the entire ROCm stack with a simple apt command.
For a long time, NVIDIA users had a much smoother experience thanks to CUDA‘s straightforward installation process, but AMD users, on the other hand, often had to work through a much more complicated setup.
With Ubuntu 26.04 LTS “Resolute Raccoon“, Canonical has closed that gap by including both AMD ROCm and NVIDIA CUDA in the standard package repositories. If you have a supported Radeon GPU, you can get your system ready for AI workloads in just a few minutes.
This guide was tested on Ubuntu 26.04 LTS using both a Radeon RX 7900 XTX and an RX 9070 XT. While the installation steps focus on Ubuntu 26.04, the BIOS recommendations, user permissions, and verification checks covered here are useful for any Linux system running ROCm.
What ROCm Actually Is
ROCm (Radeon Open Compute) is AMD’s open-source software stack for running GPU compute, and it’s the direct counterpart to NVIDIA’s CUDA. It gives you the runtime, compilers, and libraries that frameworks like PyTorch, TensorFlow, and JAX need to push math onto your GPU instead of grinding through it on the CPU.
So when you run a local LLM through Ollama, generate images with Stable Diffusion, or train a model in PyTorch, ROCm is the layer underneath doing the GPU work. The difference from CUDA is that ROCm is open source, which is why Canonical was able to package it into Ubuntu directly and commit to maintaining it long term.
One detail to know before you start, the version Ubuntu 26.04 ships is ROCm 7.1.0, which is a stable build, but it trails the upstream line, which is already on ROCm 7.2.4 as of late May 2026, so if you need the newest GPU support or features you may still want AMD’s own repo later. For most local AI work, the in-archive 7.1.0 is fine.
Hardware and BIOS Checklist
Before you touch apt, confirm your card is actually supported, because ROCm is picky about hardware in a way the gaming driver is not. Getting this wrong is the number one reason people install everything correctly and still see no GPU.
Supported GPUs
ROCm officially supports RDNA3 and RDNA4 consumer cards, which covers the Radeon RX 7000 and RX 9000 series. On the RDNA3 side that’s cards like the RX 7900 XTX, 7900 XT, 7900 GRE, and 7700 XT, and on the RDNA4 side it’s the RX 9070, 9070 XT, 9070 GRE, and 9060 XT.
| Architecture | Supported GPUs |
|---|---|
| RDNA3 |
RX 7900 XTX, RX 7900 XT, RX 7900 GRE, RX 7700 XT |
| RDNA4 |
RX 9070, RX 9070 XT, RX 9070 GRE, RX 9060 XT |
One thing to settle first, ROCm is AMD-only. If lspci shows an NVIDIA card, this guide doesn’t apply to you, and rocminfo will never see your GPU no matter what you install. NVIDIA cards run on CUDA instead, which Ubuntu 26.04 also ships natively, so that’s the path you’d follow.
If you have an RX 7000 or RX 9000 card, you’re on the supported path and the install below works as written. If you have something older, read the next part carefully before you spend time on it.
The RDNA2 Workaround for RX 6000 Cards
The Radeon RX 6000 series is RDNA2, and it’s not on the official support list, but it can still run ROCm with a community override.
You tell ROCm to treat your card as the closest supported architecture by exporting one environment variable.
export HSA_OVERRIDE_GFX_VERSION=10.3.0
What this does is make ROCm report your card’s ISA as gfx1030 (the RX 6800/6900 target), which the libraries do have kernels for. So a gfx1031 card like the RX 6700 XT or a gfx1032 card like the RX 6600 borrows the gfx1030 code path and works in most cases.
Warning: This override is a community hack, not an AMD guarantee. It can break after a ROCm point upgrade, and some workloads will crash or silently fall back to the CPU. Treat an RX 6000 card as best-effort and budget extra time for troubleshooting.
BIOS Settings You Must Enable
This is the step people skip, and then ROCm fails to initialize for no obvious reason. Two BIOS settings have to be on or the GPU can’t map enough memory for compute, and the symptom is rocminfo showing your CPU but never your GPU.
- Above 4G Decoding lets the system address GPU memory beyond the old 4GB limit, which compute needs.
- Resizable BAR, often labeled Smart Access Memory on AMD boards, lets the CPU access the full GPU memory at once.
Reboot into your BIOS or UEFI setup, find both options (usually under PCIe or Advanced settings), enable them, save, and boot back into Ubuntu. If you only enable one, ROCm can still misbehave, so turn on both.
Kernel Access Groups
The Linux kernel exposes the GPU compute device at /dev/kfd, and only members of the render and video groups can talk to it without root. So your normal user account has to be in both groups, or every ROCm command will hit a permission wall.
We’ll add you to those groups during the install steps below, so just know now that it’s required and not optional.
Step 1: Confirm the GPU Is Detected
Before installing anything, check that Ubuntu sees your card using the lspci command lists PCI devices, and piping it through grep filters that list down to your GPU line.
lspci | grep -iE 'vga|3d|display'
Here’s what each part is doing:
- lspci prints every PCI device attached to the system.
- grep -iE ‘vga|3d|display’ keeps only lines matching
vga,3d, ordisplay, with-ifor case-insensitive matching and-Efor the extended pattern.
Output:
03:00.0 VGA compatible controller: Advanced Micro Devices, Inc. [AMD/ATI] Navi 31 [Radeon RX 7900 XTX] (rev c8)
That output names the card on the PCI bus, so you can confirm it’s the AMD GPU you expect. If you see your Radeon model here, the hardware is detected and you’re good to install. If nothing shows up, the card isn’t seated or powered correctly, and ROCm can’t help with that.
Step 2: Install ROCm from the Ubuntu Repository
First refresh the package lists, then install the rocm metapackage, which pulls in the runtime, libraries, and tools in one shot.
sudo apt update
sudo apt install rocm
ROCm is a big install and the download can take a while depending on your connection. Press Y and let it finish. When it’s done you’ll have rocminfo, rocm-smi, and the HIP libraries that PyTorch and Ollama look for.
Step 3: Add Your User to the Render and Video Groups
ROCm installed, but your user still can’t reach the GPU device until it’s in the right groups, so use the usermod command to edit user accounts, and here we append two groups to your existing membership.
sudo usermod -aG render,video $USER
Here’s the breakdown:
-aGappends the listed groups instead of replacing all your current ones. Dropping theawould wipe your other group memberships, so never leave it out.renderandvideoare the two groups that grant access to/dev/kfdand/dev/dri.$USERexpands to your current username automatically.
Group changes only apply to new login sessions, so log out and back in, or reboot, then confirm with the groups command.
groups
Output:
ravi adm cdrom sudo dip plugdev render video
You’re looking for render and video in that list. If both are there, your account can talk to the GPU. If they’re missing, you skipped the logout, so log out and back in again.
Step 4: Verify ROCm Sees Your GPU
The rocminfo command queries the ROCm runtime and lists every compute agent it finds, which means your CPU and, if everything worked, your GPU.
rocminfo
Output:
*******
Agent 2
*******
  Name:                    gfx1100
  Marketing Name:          AMD Radeon RX 7900 XTX
  Device Type:             GPU
  Cache Info:
    L1:                      32(0x20) KB
  ...
The line that tells you everything is Device Type: GPU under an agent showing your card’s Name (here gfx1100 for the RX 7900 XTX).
That means ROCm found your GPU and can run compute on it. If the only agent listed is your CPU, the GPU isn’t visible to ROCm, and that’s almost always the BIOS settings or the group membership from earlier.
You can also check live GPU stats with rocm-smi, which works like NVIDIA’s nvidia-smi and shows temperature, power, and memory use.
rocm-smi
Output:
========================= ROCm System Management Interface =========================
GPU  Temp   AvgPwr   SCLK     MCLK     Fan   Perf  VRAM%  GPU%
0    42.0c  38.0W    500Mhz   96Mhz    0%    auto  3%     0%
====================================================================================
That table confirms the card is alive and reporting, and the GPU% column is what jumps during inference once you start running models. Watching it climb is the simplest proof your workload is actually on the GPU and not quietly running on the CPU.
rocminfo finally printed your GPU instead of just your CPU, still stuck on a CPU-only setup.Step 5: Test It with PyTorch
A clean rocminfo is good, but a real framework test is better, so install the ROCm build of PyTorch in a virtual environment, then ask Torch whether it can see the GPU.
python3 -c "import torch; print(torch.cuda.is_available())"
Output:
True
A True here means PyTorch can run on your Radeon. And yes, the function is still called torch.cuda.is_available() even on AMD, because ROCm uses HIP to map the CUDA API onto AMD hardware, so most PyTorch code runs unchanged. If you get False, the override or groups need another look, especially on an RX 6000 card.
Tip: For an RX 6000 card, put the override in your shell startup so it sticks across reboots:
echo 'export HSA_OVERRIDE_GFX_VERSION=10.3.0' >> ~/.bashrc
then open a new terminal before testing.
Conclusion
You set up AMD ROCm natively on Ubuntu 26.04, confirmed your Radeon card with rocminfo and rocm-smi, added your user to the render and video groups, and got a True out of PyTorch.
Right now, open rocm-smi in one terminal and run a small model in another, then watch the GPU% column move. That single check is the fastest way to prove your AI work is hitting the GPU and not silently falling back to the CPU.
What card are you running ROCm on, and did the native Ubuntu 26.04 install work cleanly for you or did you hit a snag? Drop it in the comments, especially if you got an RX 6000 card working, since those results help everyone else on RDNA2.


