It is time to deploy a Stretched Tier-0 Gateway
- Configure segments for the Tier-0 Uplink
- Create a Stretched Tier-0 GW
- Connect the Stretched Tier-1 GW to the Stretched Tier-0 GW
- Test end to end connectivity
First we need to log into the Primary Global Manager

Networking > Conenectivity > Segments
ADD SEGMENT
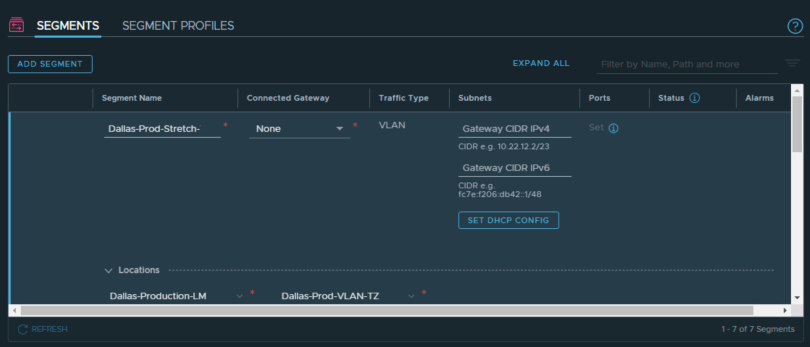
Name the Segment – I recommend putting something to indicate stretched uplink
Choose the primary location and the primary VLAN Transport Zone
Provide the VLAN ID and save

No

Confirm the status is successful
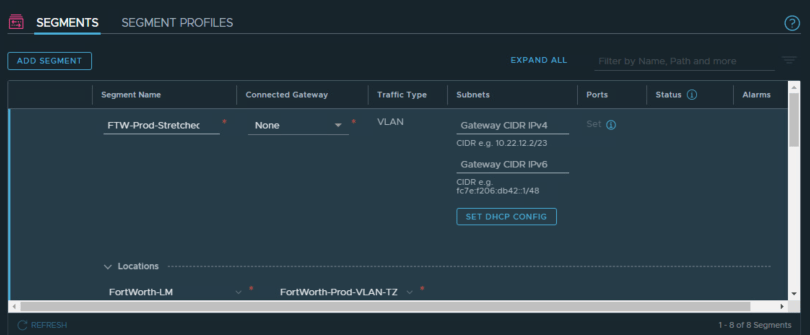
Create a second segment for the other uplink
Provide a name that indicates this is a VLAN from the secondary site and that it is for stretching
Select your secondary location and the VLAN Transport Zone for your second site
Provide the VLAN ID
Save

No

Confirm the status is success
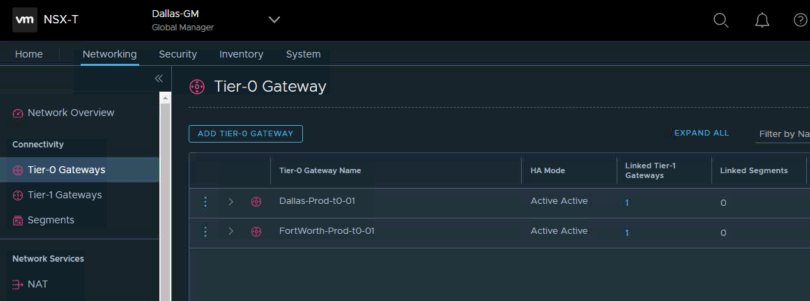
Networking > Connectivity > Tier-0 Gateways
ADD TIER-0 GAEWAY
Enter a name for this gateway
HA Mode set to Active Active
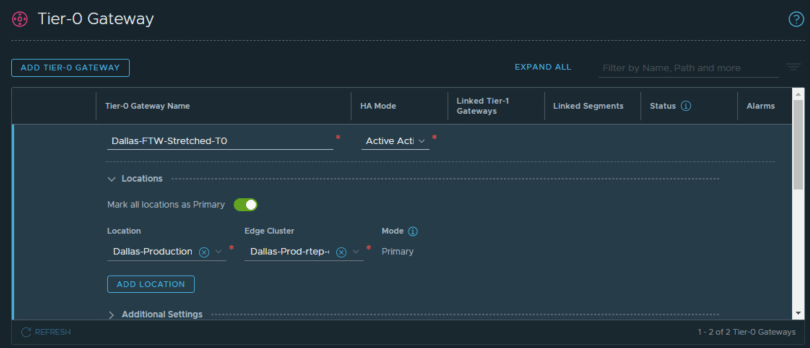
Pick the primary location and the edge cluster that has the RTEP
ADD LOCATION

Disable Mark all locations as Primary
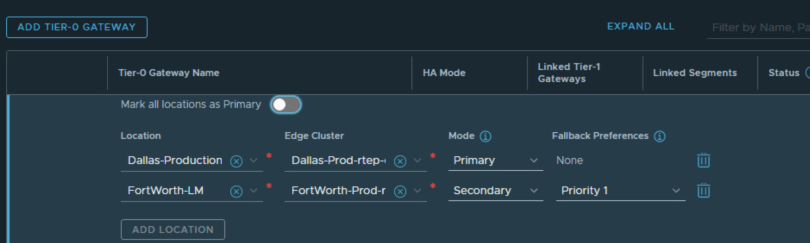
Enter in your secondary location and RTEP Cluster
Set Mode to Secondary
Failback Preferences to Priority 1
SAVE

Yes
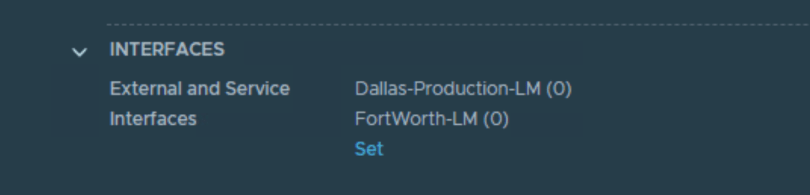
Set
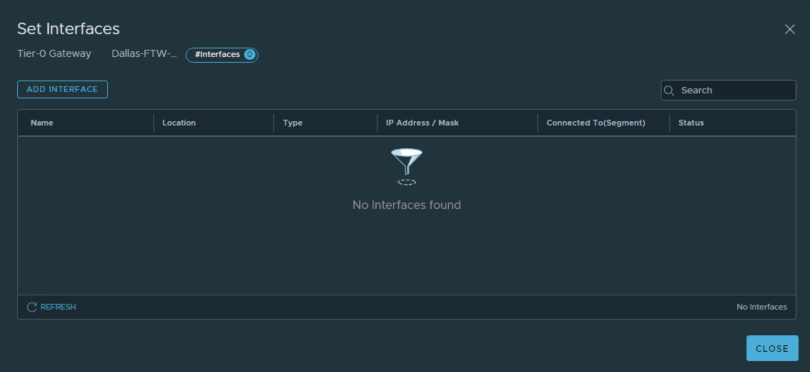
ADD Interface
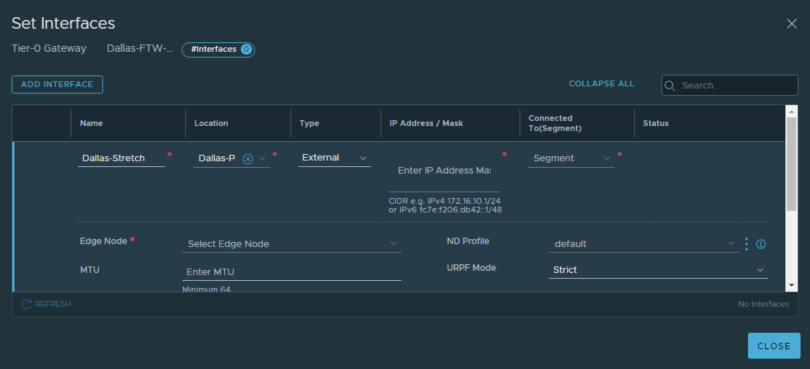
Provide a name to indicate this interface belongs to the primary site
Select the primary location
Provide the IP address for the uplink
Connect to the primary location T0-uplink segment
Then select the edge node that supports the RTEP
Save
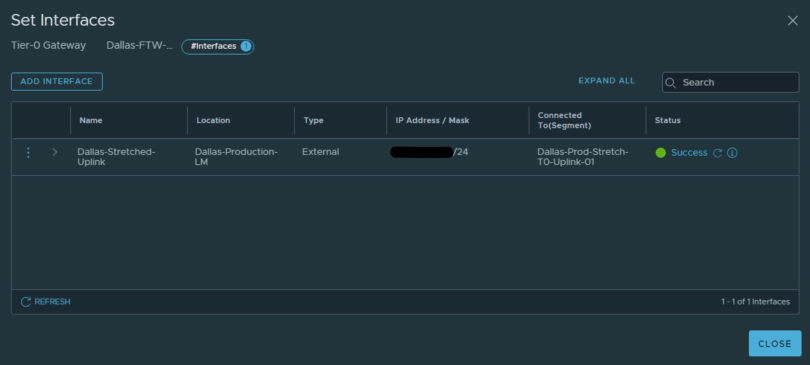
Confirm the status successful
ADD INTERFACE
Repeat the process for the second uplink to the secondary location
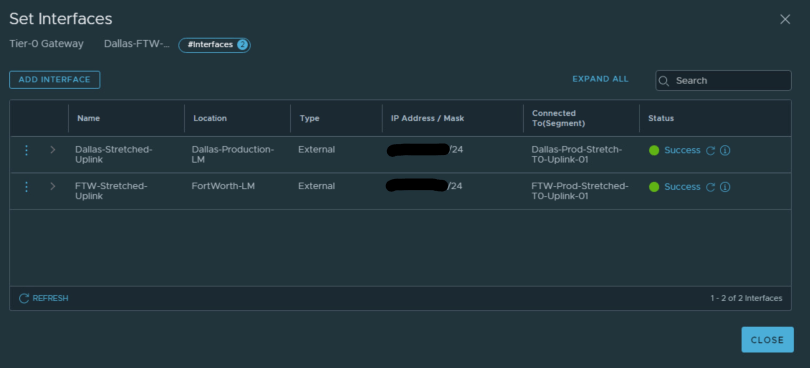
Confirm both uplinks are up
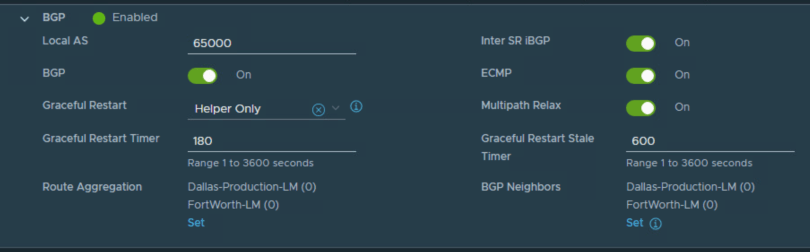
Change the local AS to whatever is in your environment
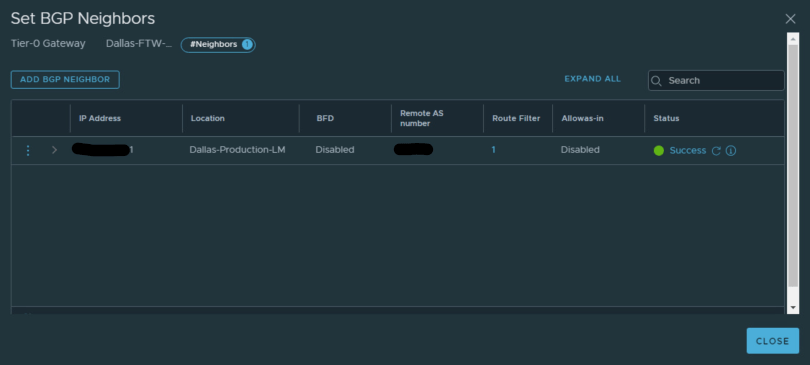
Click Set under BGP Neighbors
ADD BGP NEIGHBOR
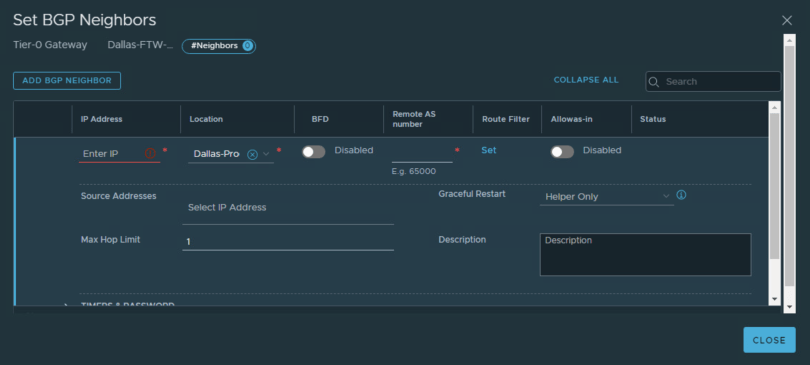
Enter the IP for the neighbor
Select your primary site LM
Enter the remote AS number
Put in the remote IP
Save
ADD BGP NEIGHBOR
Repeat process but for your secondary site
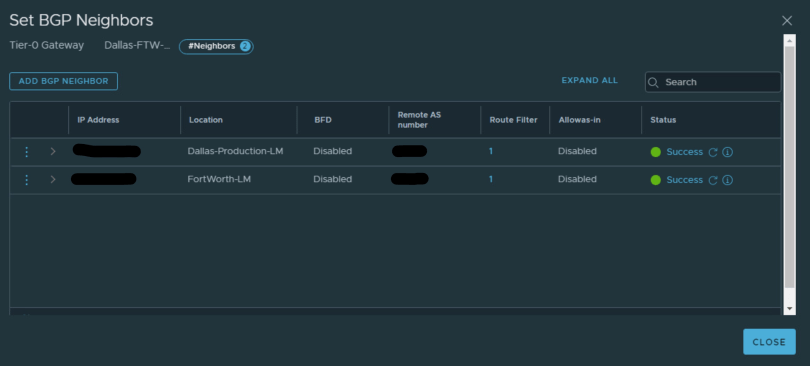
Confirm status is successful

Click Set for the primary location
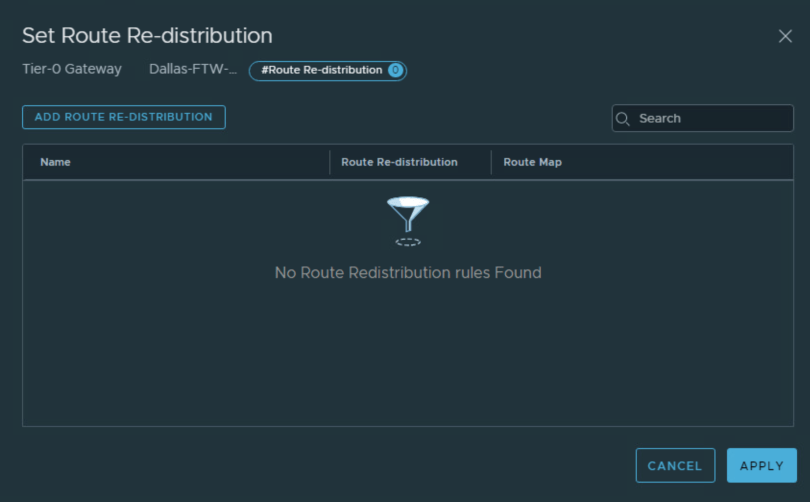
ADD ROUTE RE-DISTRIBUTION
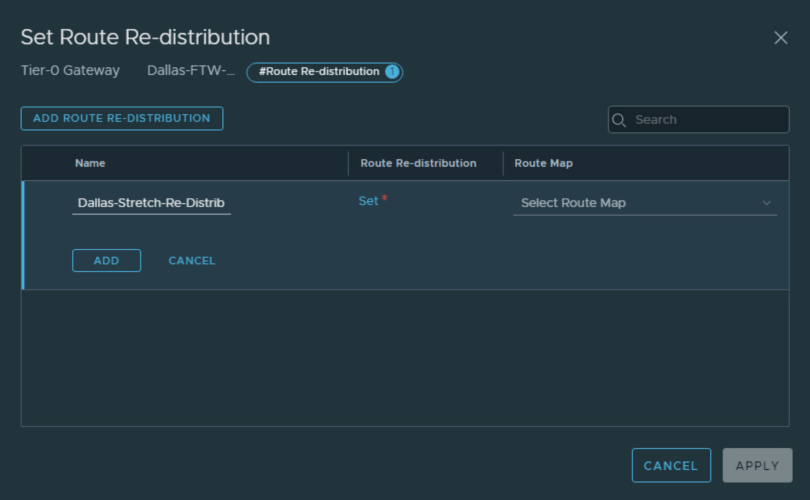
Provide a name
Click Set
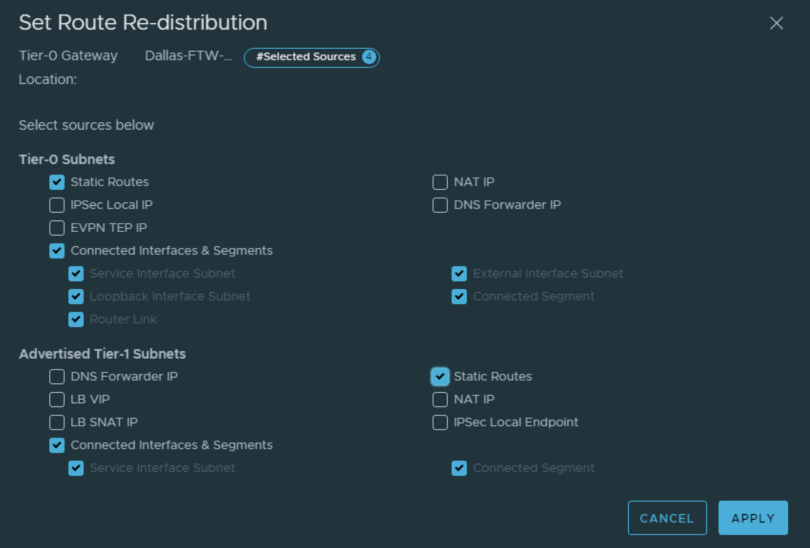
Select Static Routes and Connected Interfaces & Segments for both Tier-0 and Tier-1
Apply
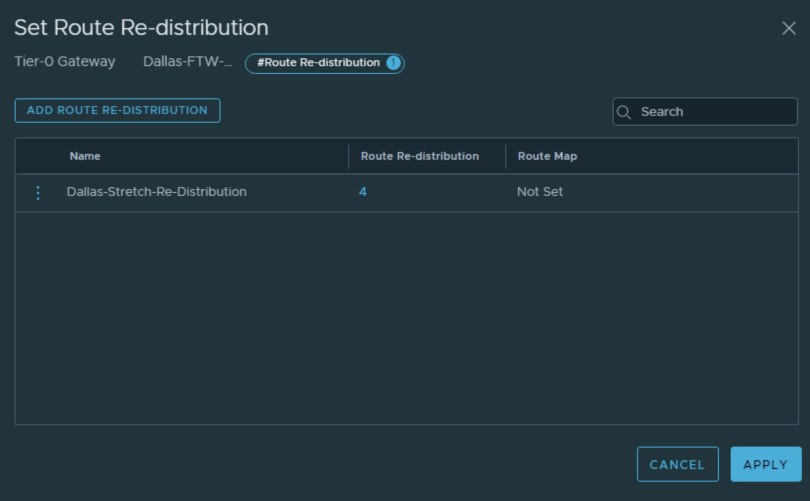
Repeat for secondary site too

Confirm Route Re-Distribution is set for both locations
Save
Close Editing
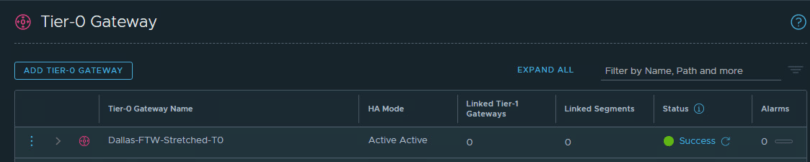
Confirm the status is successful
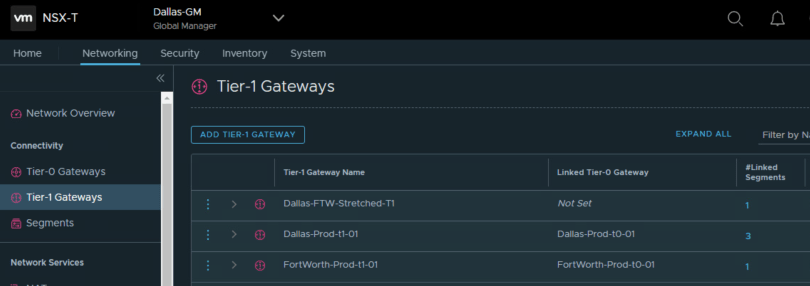
Edit your stretched T1
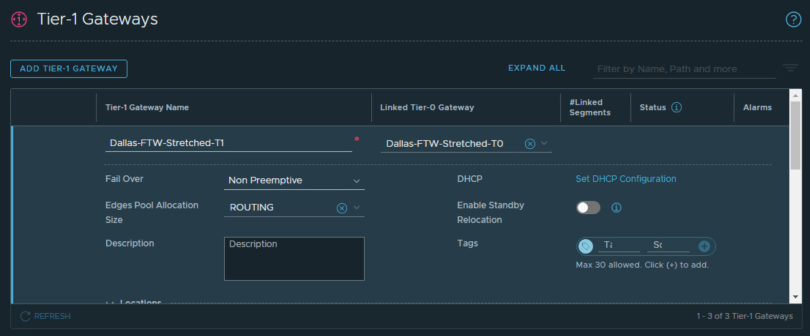
Add the stretched T0 GW to the stretched T1 GW
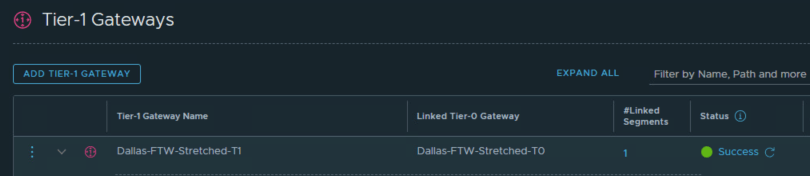
Confirm the status
Finally we need to test connectivity from an outside workstation to the test virtual machines in your Primary and Secondary locations
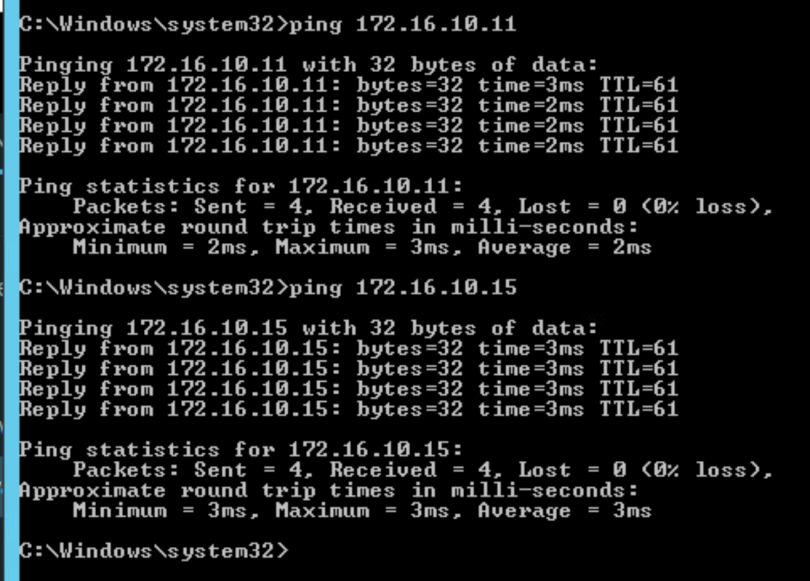
This proves the ability to ping from outside the NSX-T network to virtual machines inside the NSX-T network